Hollow grinding the face of a handplane blade
Few gifts mean more to me than my girlfriend giving me kid-free time to lose myself in the rhythm of sharpening blades.
I sharpen many types of blades: kitchen knives, chisels, pruning shears, and shovels (yes) to name a few.
Today I want to focus on hand plane blades, more specifically on what to do with their face. You'll learn how to save a lot of time using an approach which is common for chisels, but somehow one that's not often seen for plane blades: having a concave face.
What's a hand plane blade?
A hand plane blade (also known as an iron) is the cutting part of a hand plane, a woodworking tool used to smooth, flatten, or shape wood surfaces.
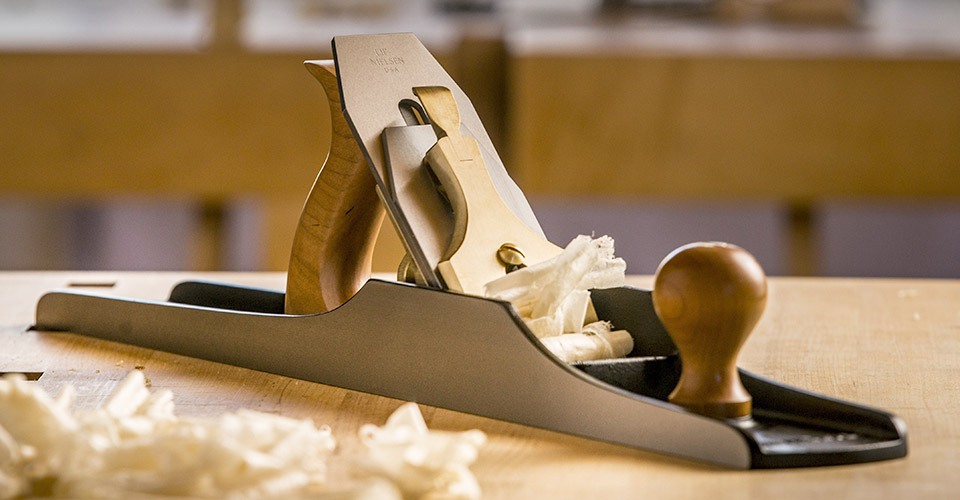
A hand plane (courtesy of Lie-Nielsen Toolworks).
The blade is typically made of hardened steel (O1 or A2, for example) and has a sharp, beveled edge that slices off thin shavings of wood as you push the plane across the surface. The hand plane body holds the blade in place at a precise angle. You can adjust the depth and alignment of the blade to control the thickness and smoothness of the cut.
The cutting edge of a hand plane blade is the fine line where the bevel meets the flat face of the blade:
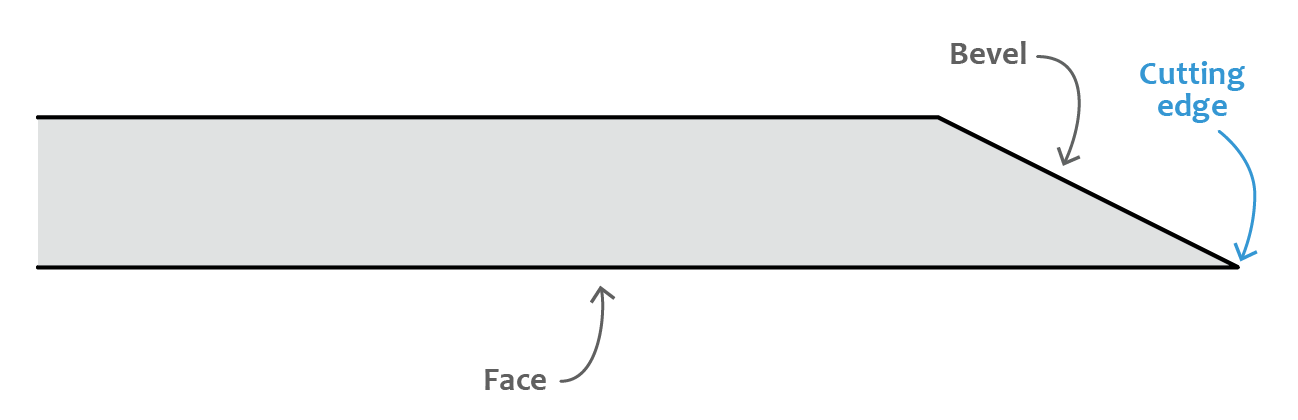
Hand plane blade anatomy.
This intersection forms a sharp edge that slices through wood fibers. The quality and sharpness of this edge depend on how precisely you:
- Sharpen the bevel.
- Lap (flatten and polish) the face.
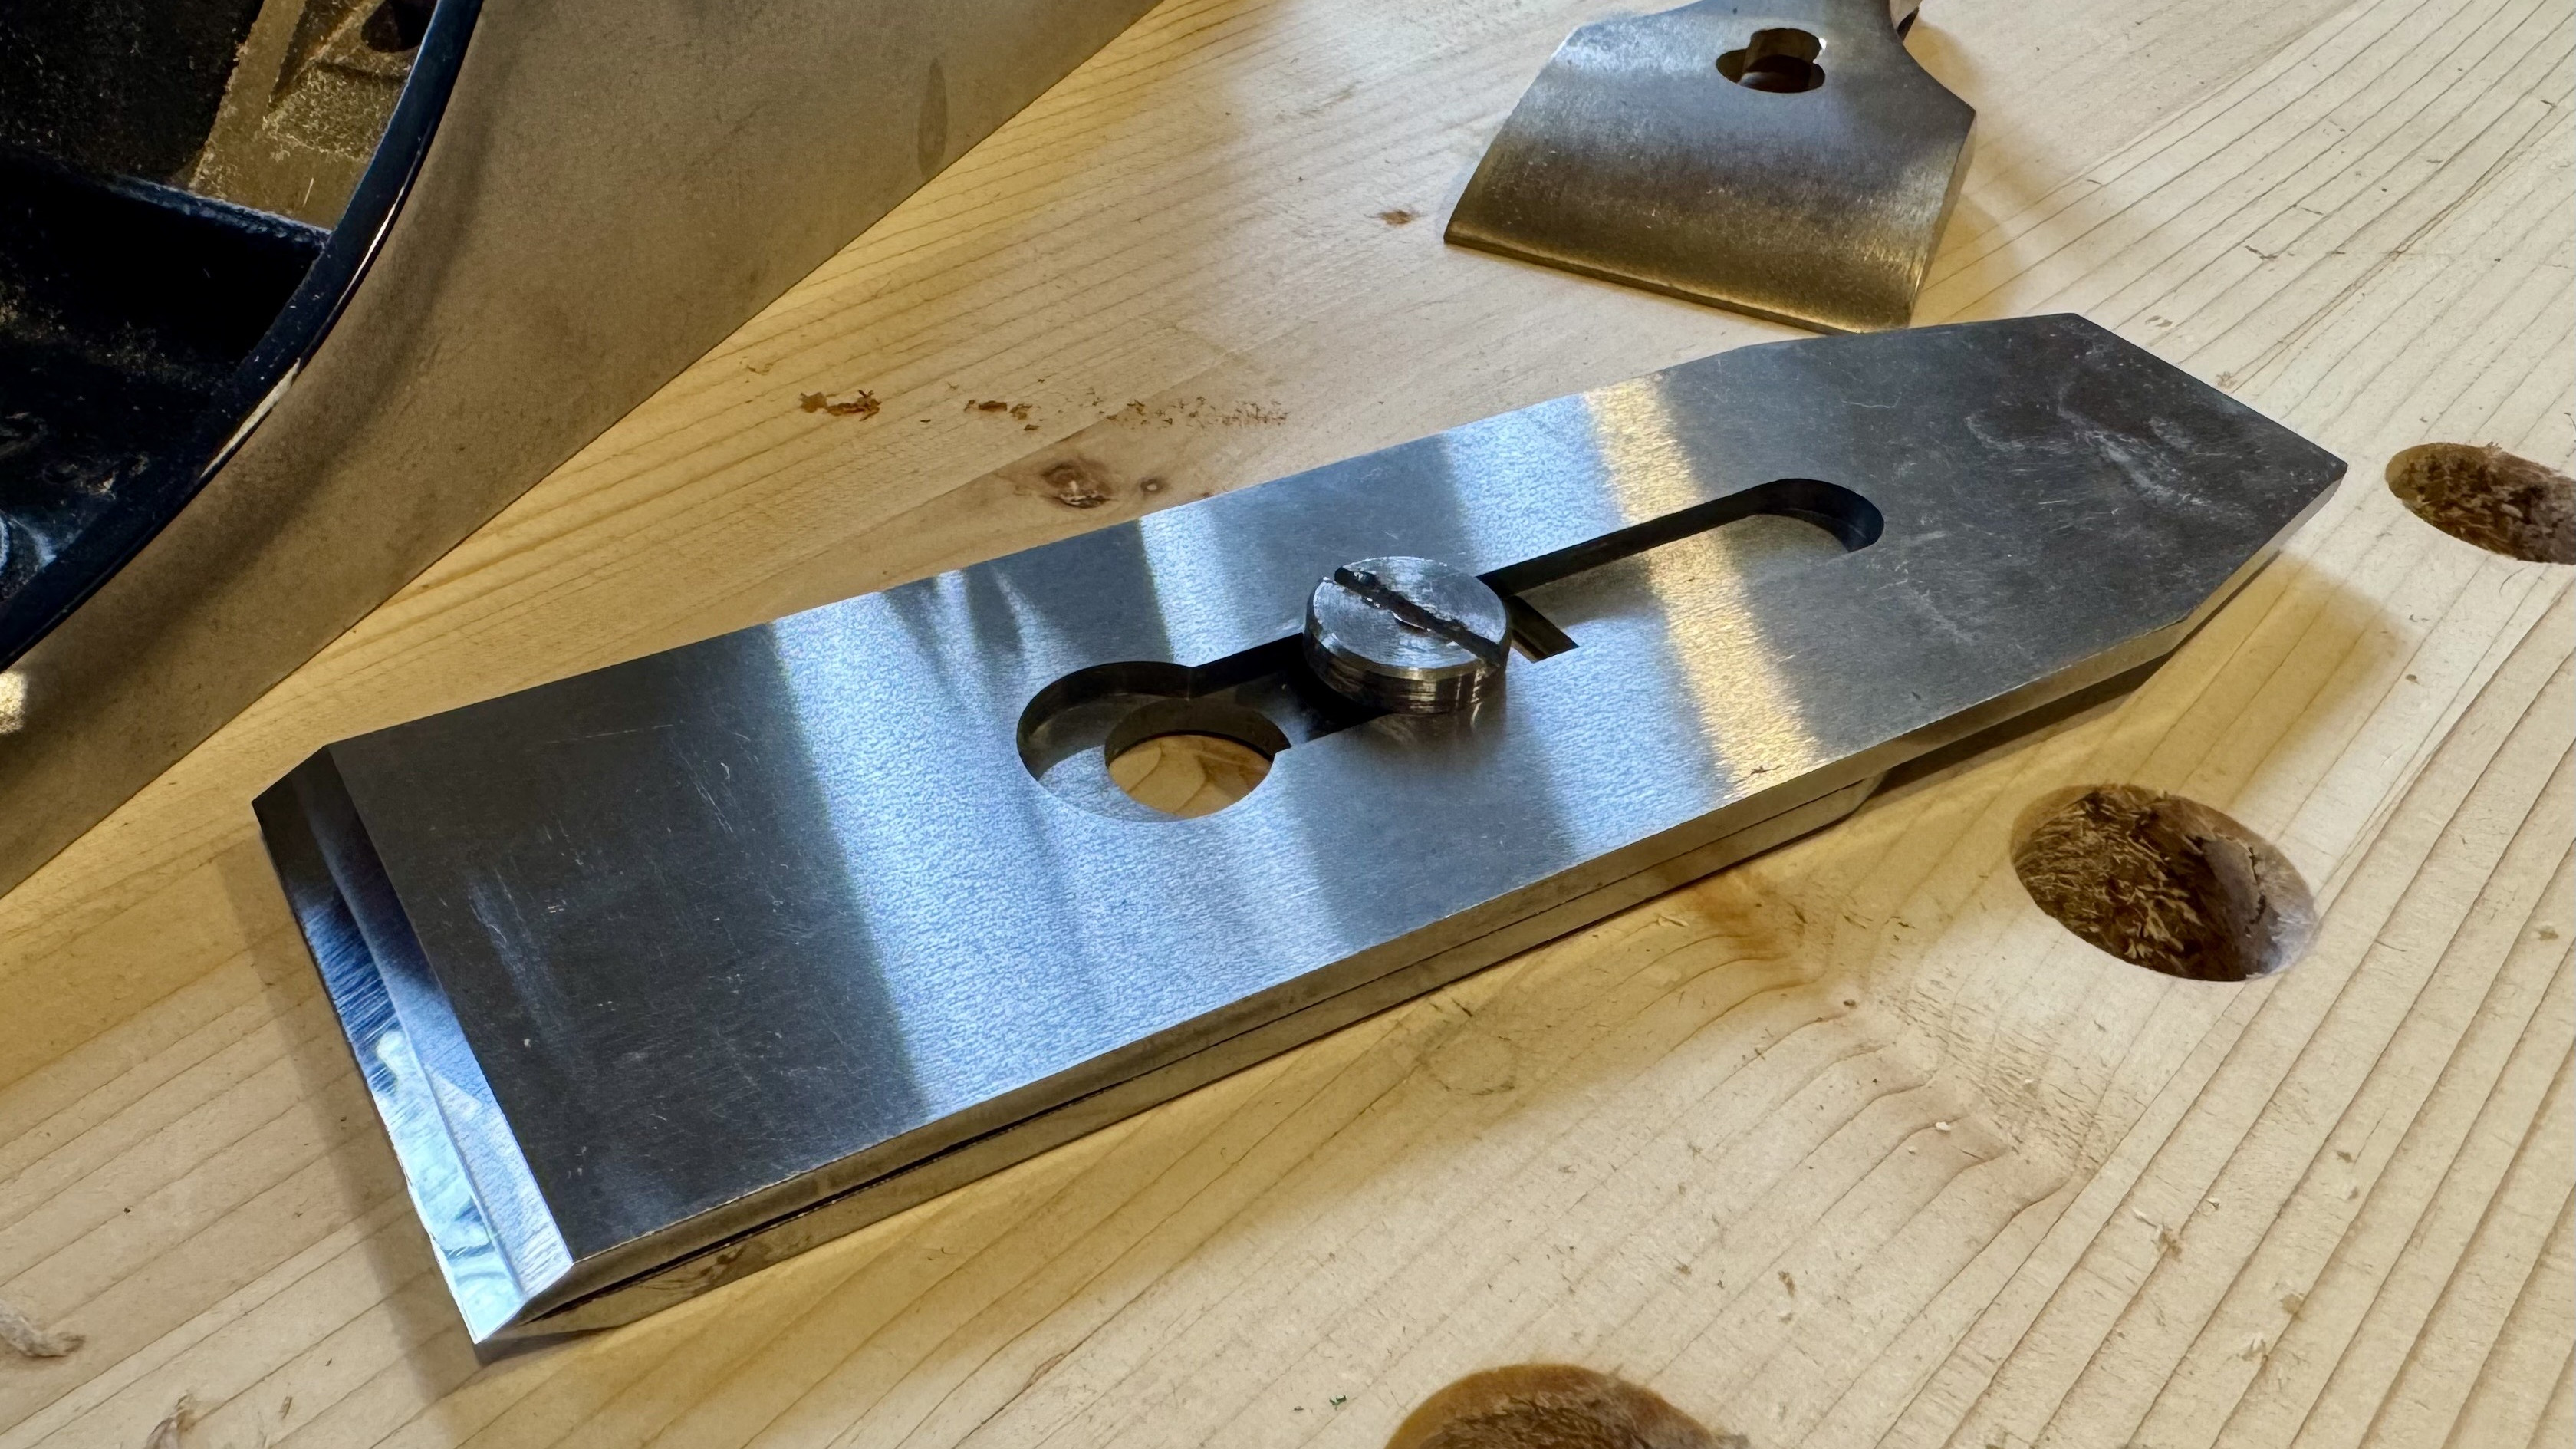
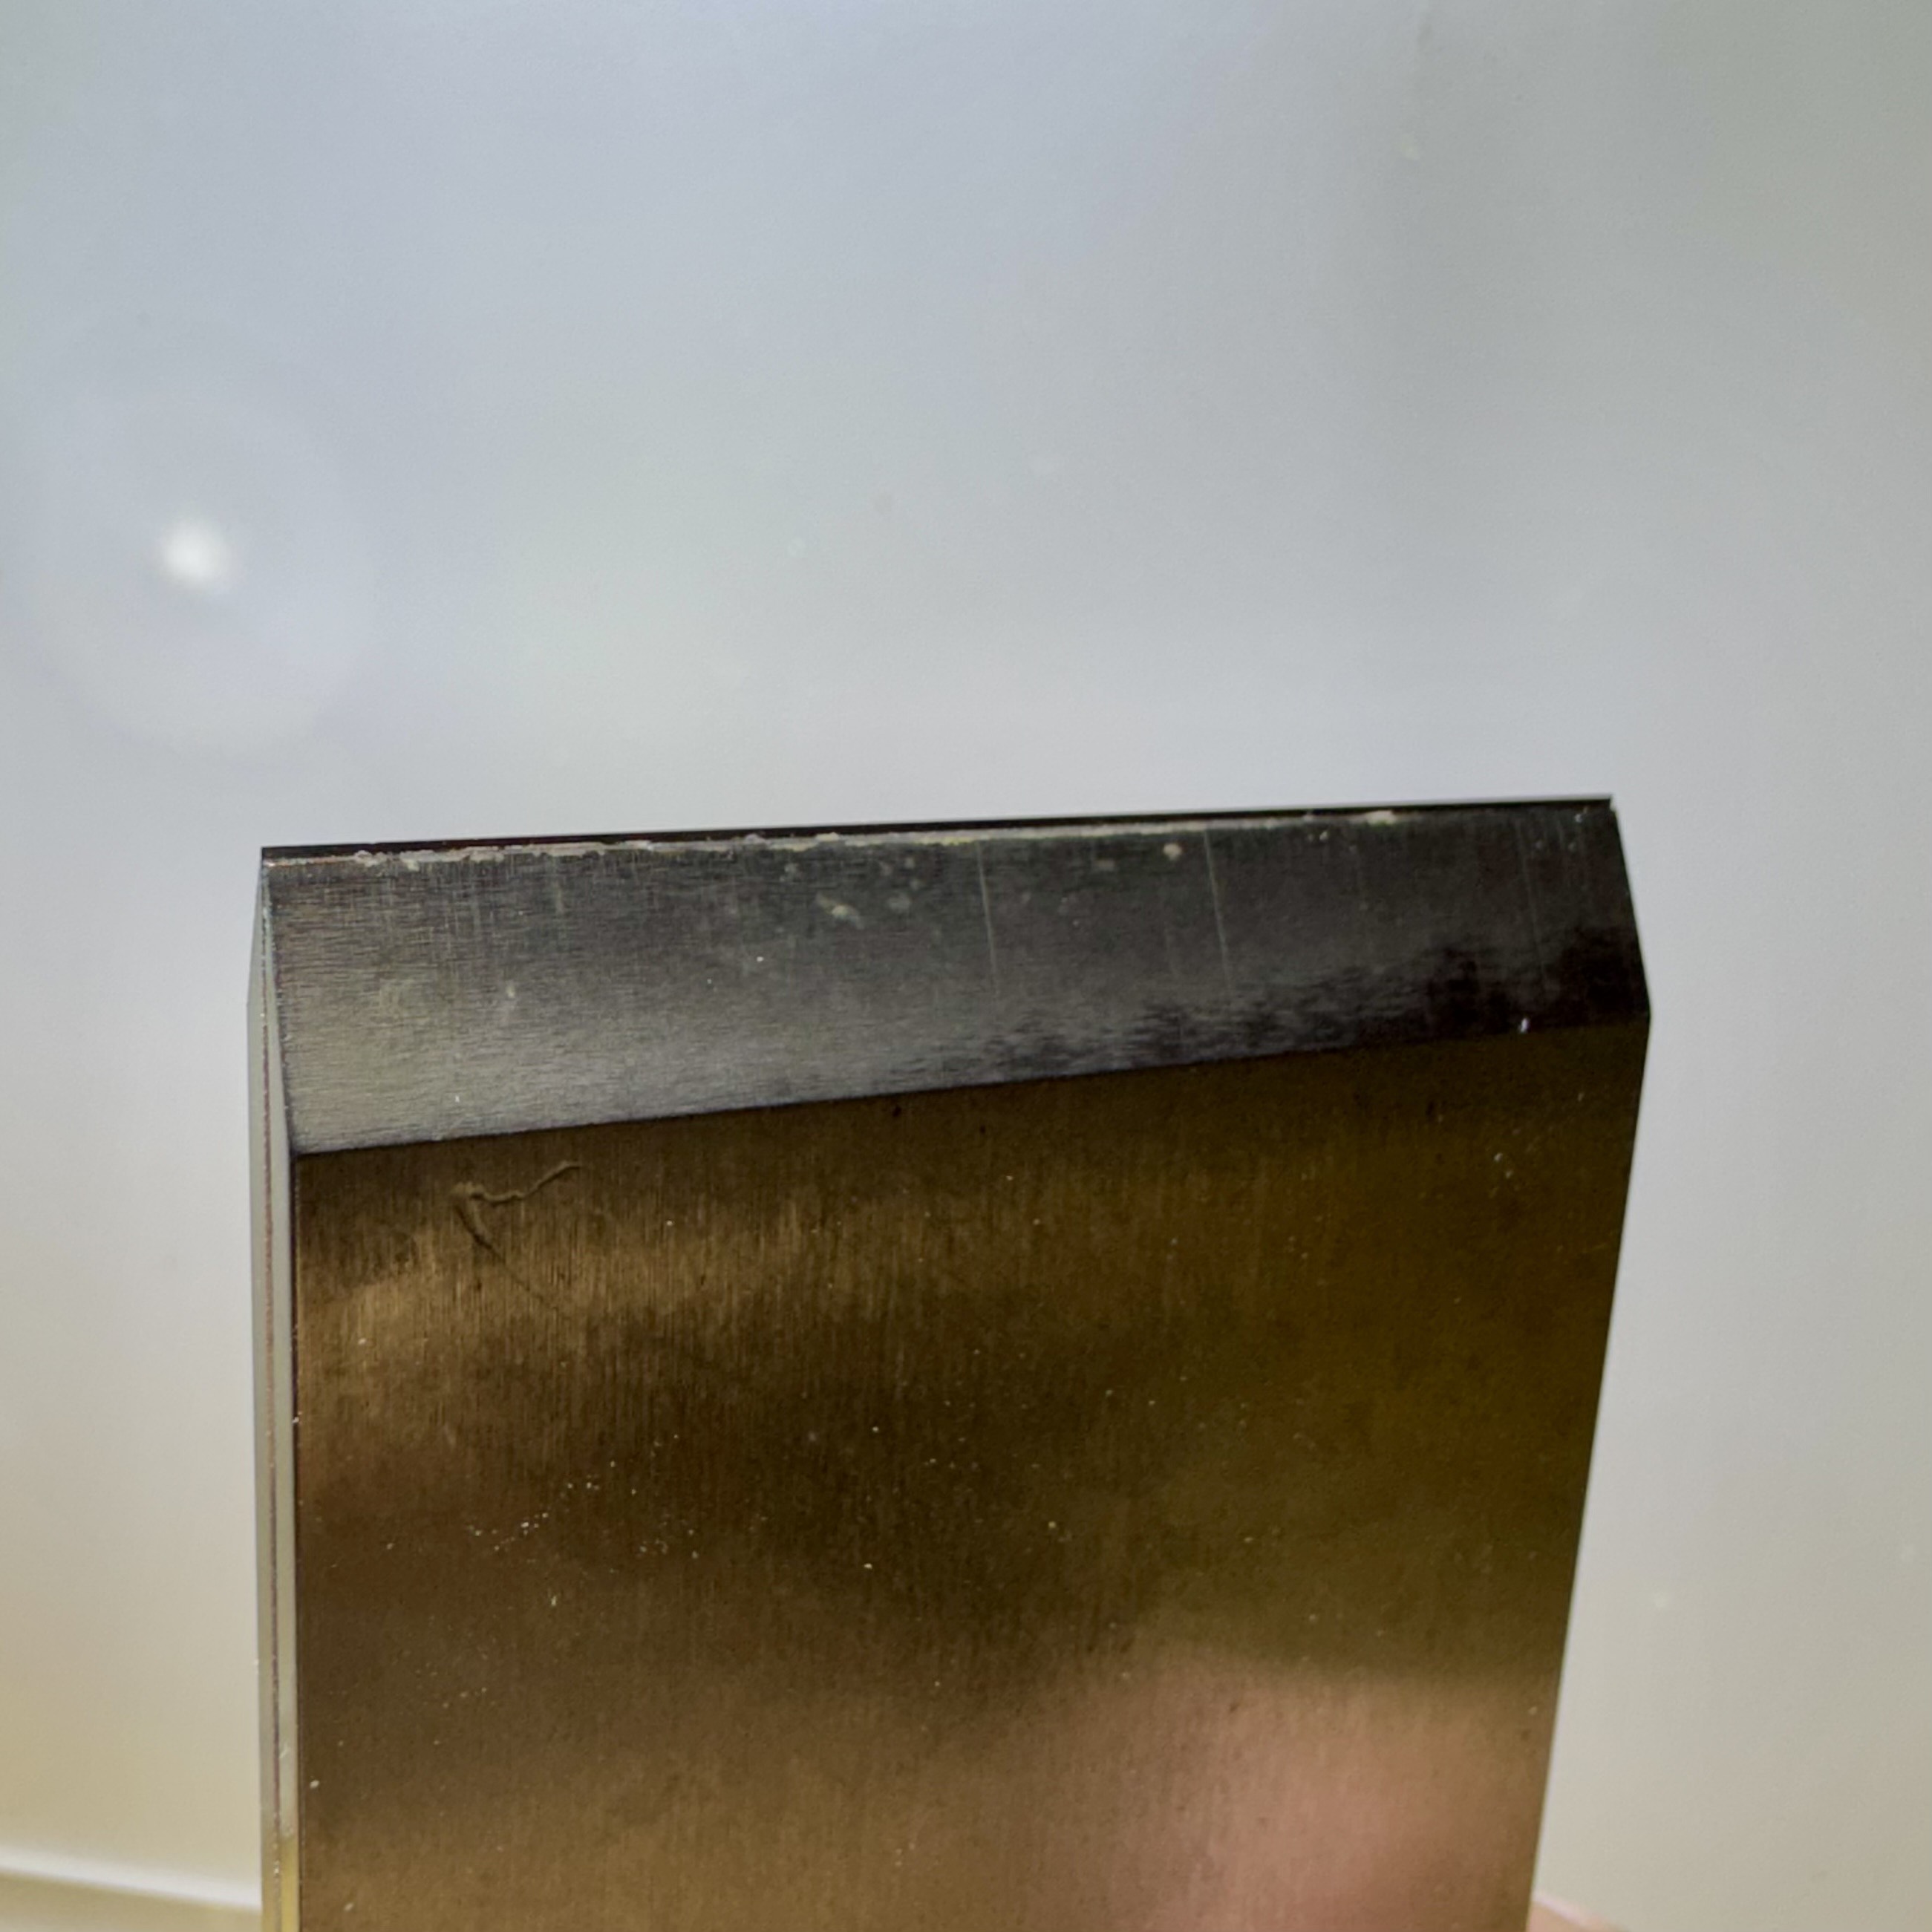
Here's the profile of one of my blades:
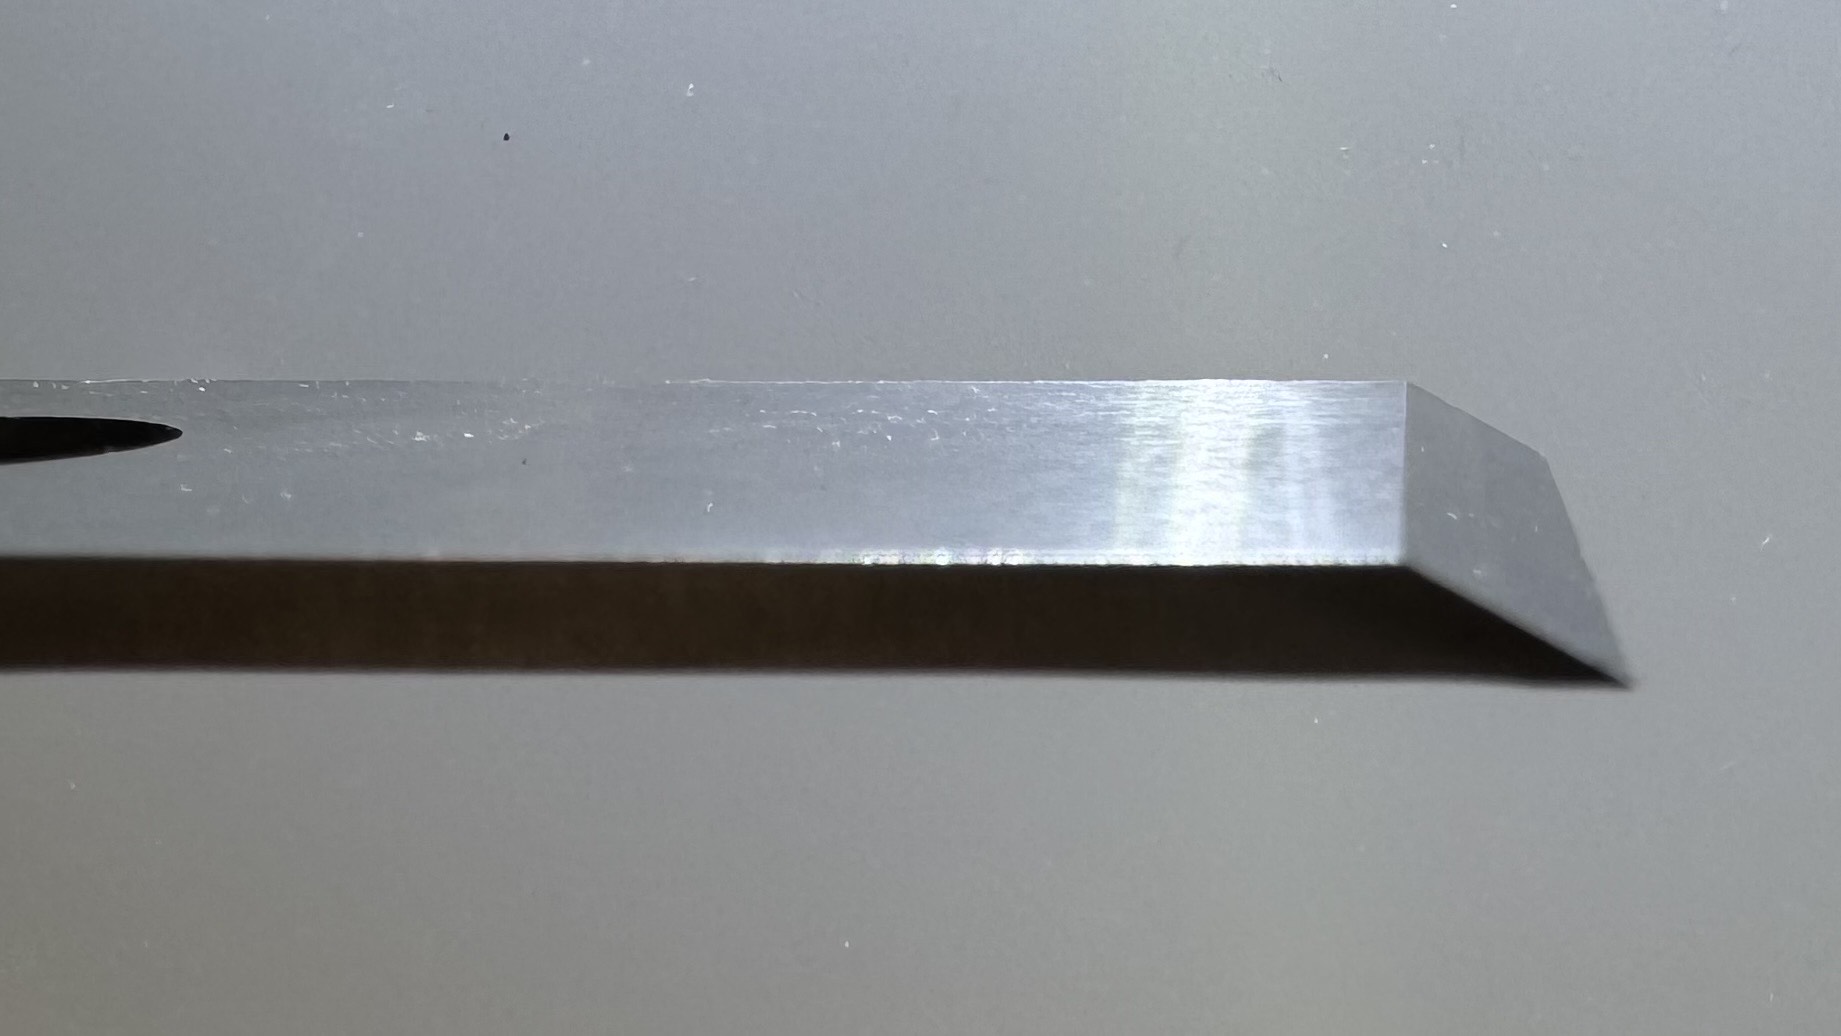
Profile of a real hand plane blade.
The chip breaker sits just behind the cutting edge of a hand plane blade:
Hand plane blade and chip breaker.
The chip breaker adds rigidity to the blade to minimize chatter. It can also curl and break the shavings as the blade cuts.
New blade
When you buy a new hand plane, or when you find an old, used one which was neglected, the face of its blade is rough:
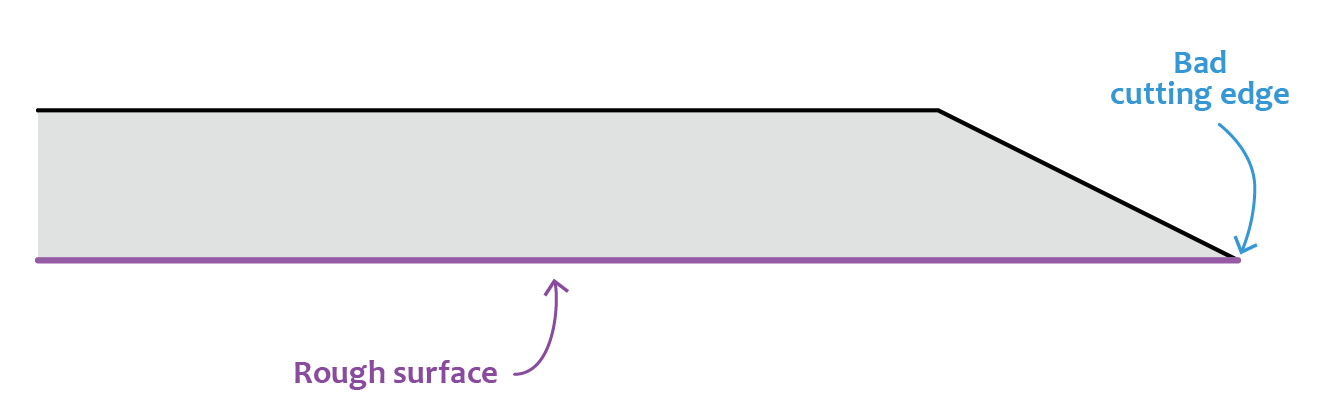
Profile of a new blade.
Depending on the maker, they grind the initial face somewhat coarsely during the fabrication process.
As explained above, a rough face means a dull cutting edge.
The default approach to fix this is to lap a good 1¾" to 2" off the face to make that section perfectly flat:
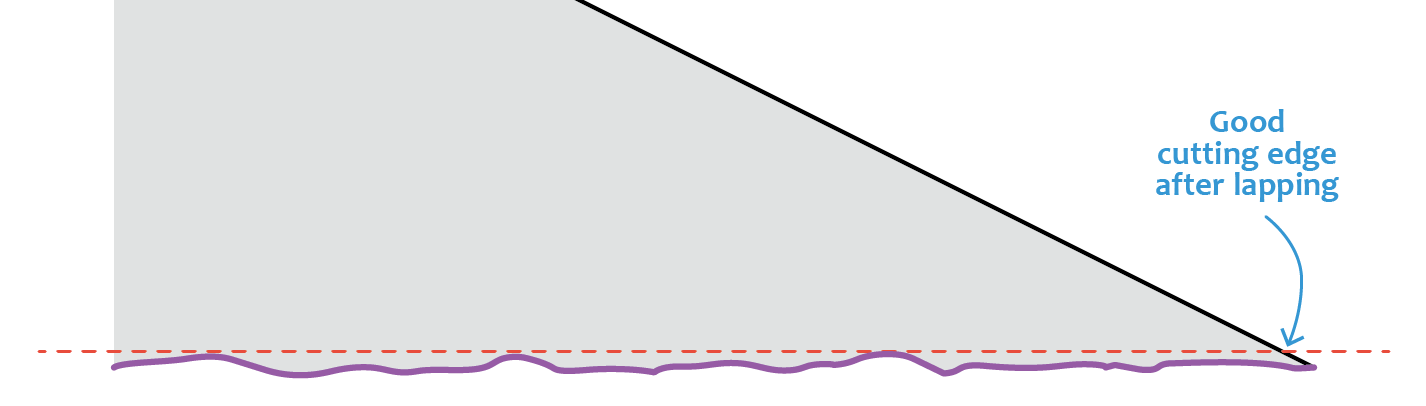
Lapping requirements of a new blade.
1¾" or more ensures enough stability against the flat abrasive surface (such as a whetstone) to achieve quality lapping.
That being said, lapping is a very tedious operation. We're talking about several hours of work sometimes. This is because, unlike when sharpening a bevel, you need to remove a large amount of steel, and the manual pressure on any given point is quite low due to the large surface area. Also, some tool steels such as A2 are very hard and therefore take a longer time to lap/sharpen.
Even if you lap the face perfectly, you'll have to do it again the next time you sharpen the bevel to remove the burr. It won't take as long of course, but keep in mind that a large surface remains in contact with the whetstone, therefore the pressure isn't specifically focused on the cutting edge.
Knowing this, woodworkers usually find a way to avoid lapping when it's not strictly necessary. One popular approach is called the ruler trick.
Ruler trick
The ruler trick, an “invention” of David Charlesworth, is a (somewhat) clever method to save time when lapping the face of a hand plane.
By placing a thin steel ruler along one edge of a whetstone and resting the face of the blade on it, the blade is lifted slightly, creating a tiny angle that allows you to lap just the final 1/8" or so near the cutting edge:
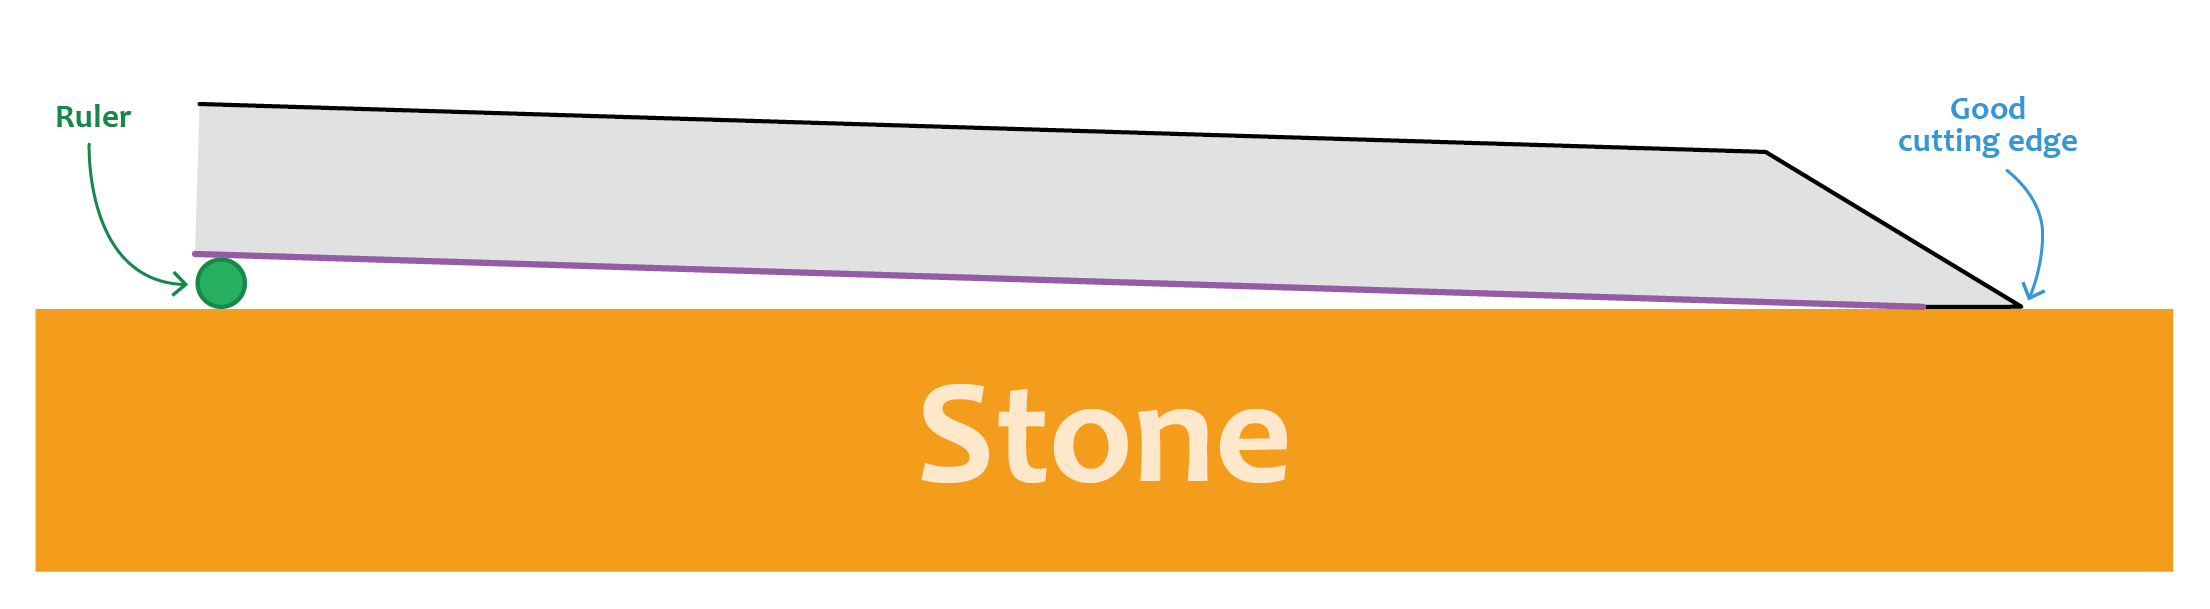
Ruler trick.
The result is a narrow “back bevel”:
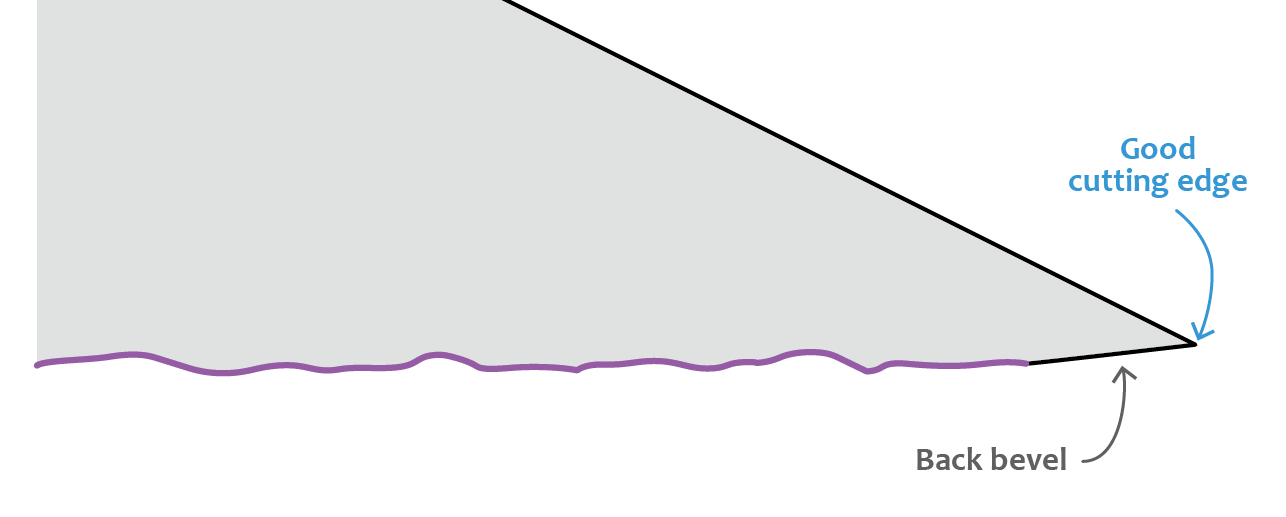
Back bevel on the face of a hand plane blade.
Note that the angles and distances in the diagrams above are exaggerated: the angle of the back bevel is typically under one degree.
Here's a typical setup:
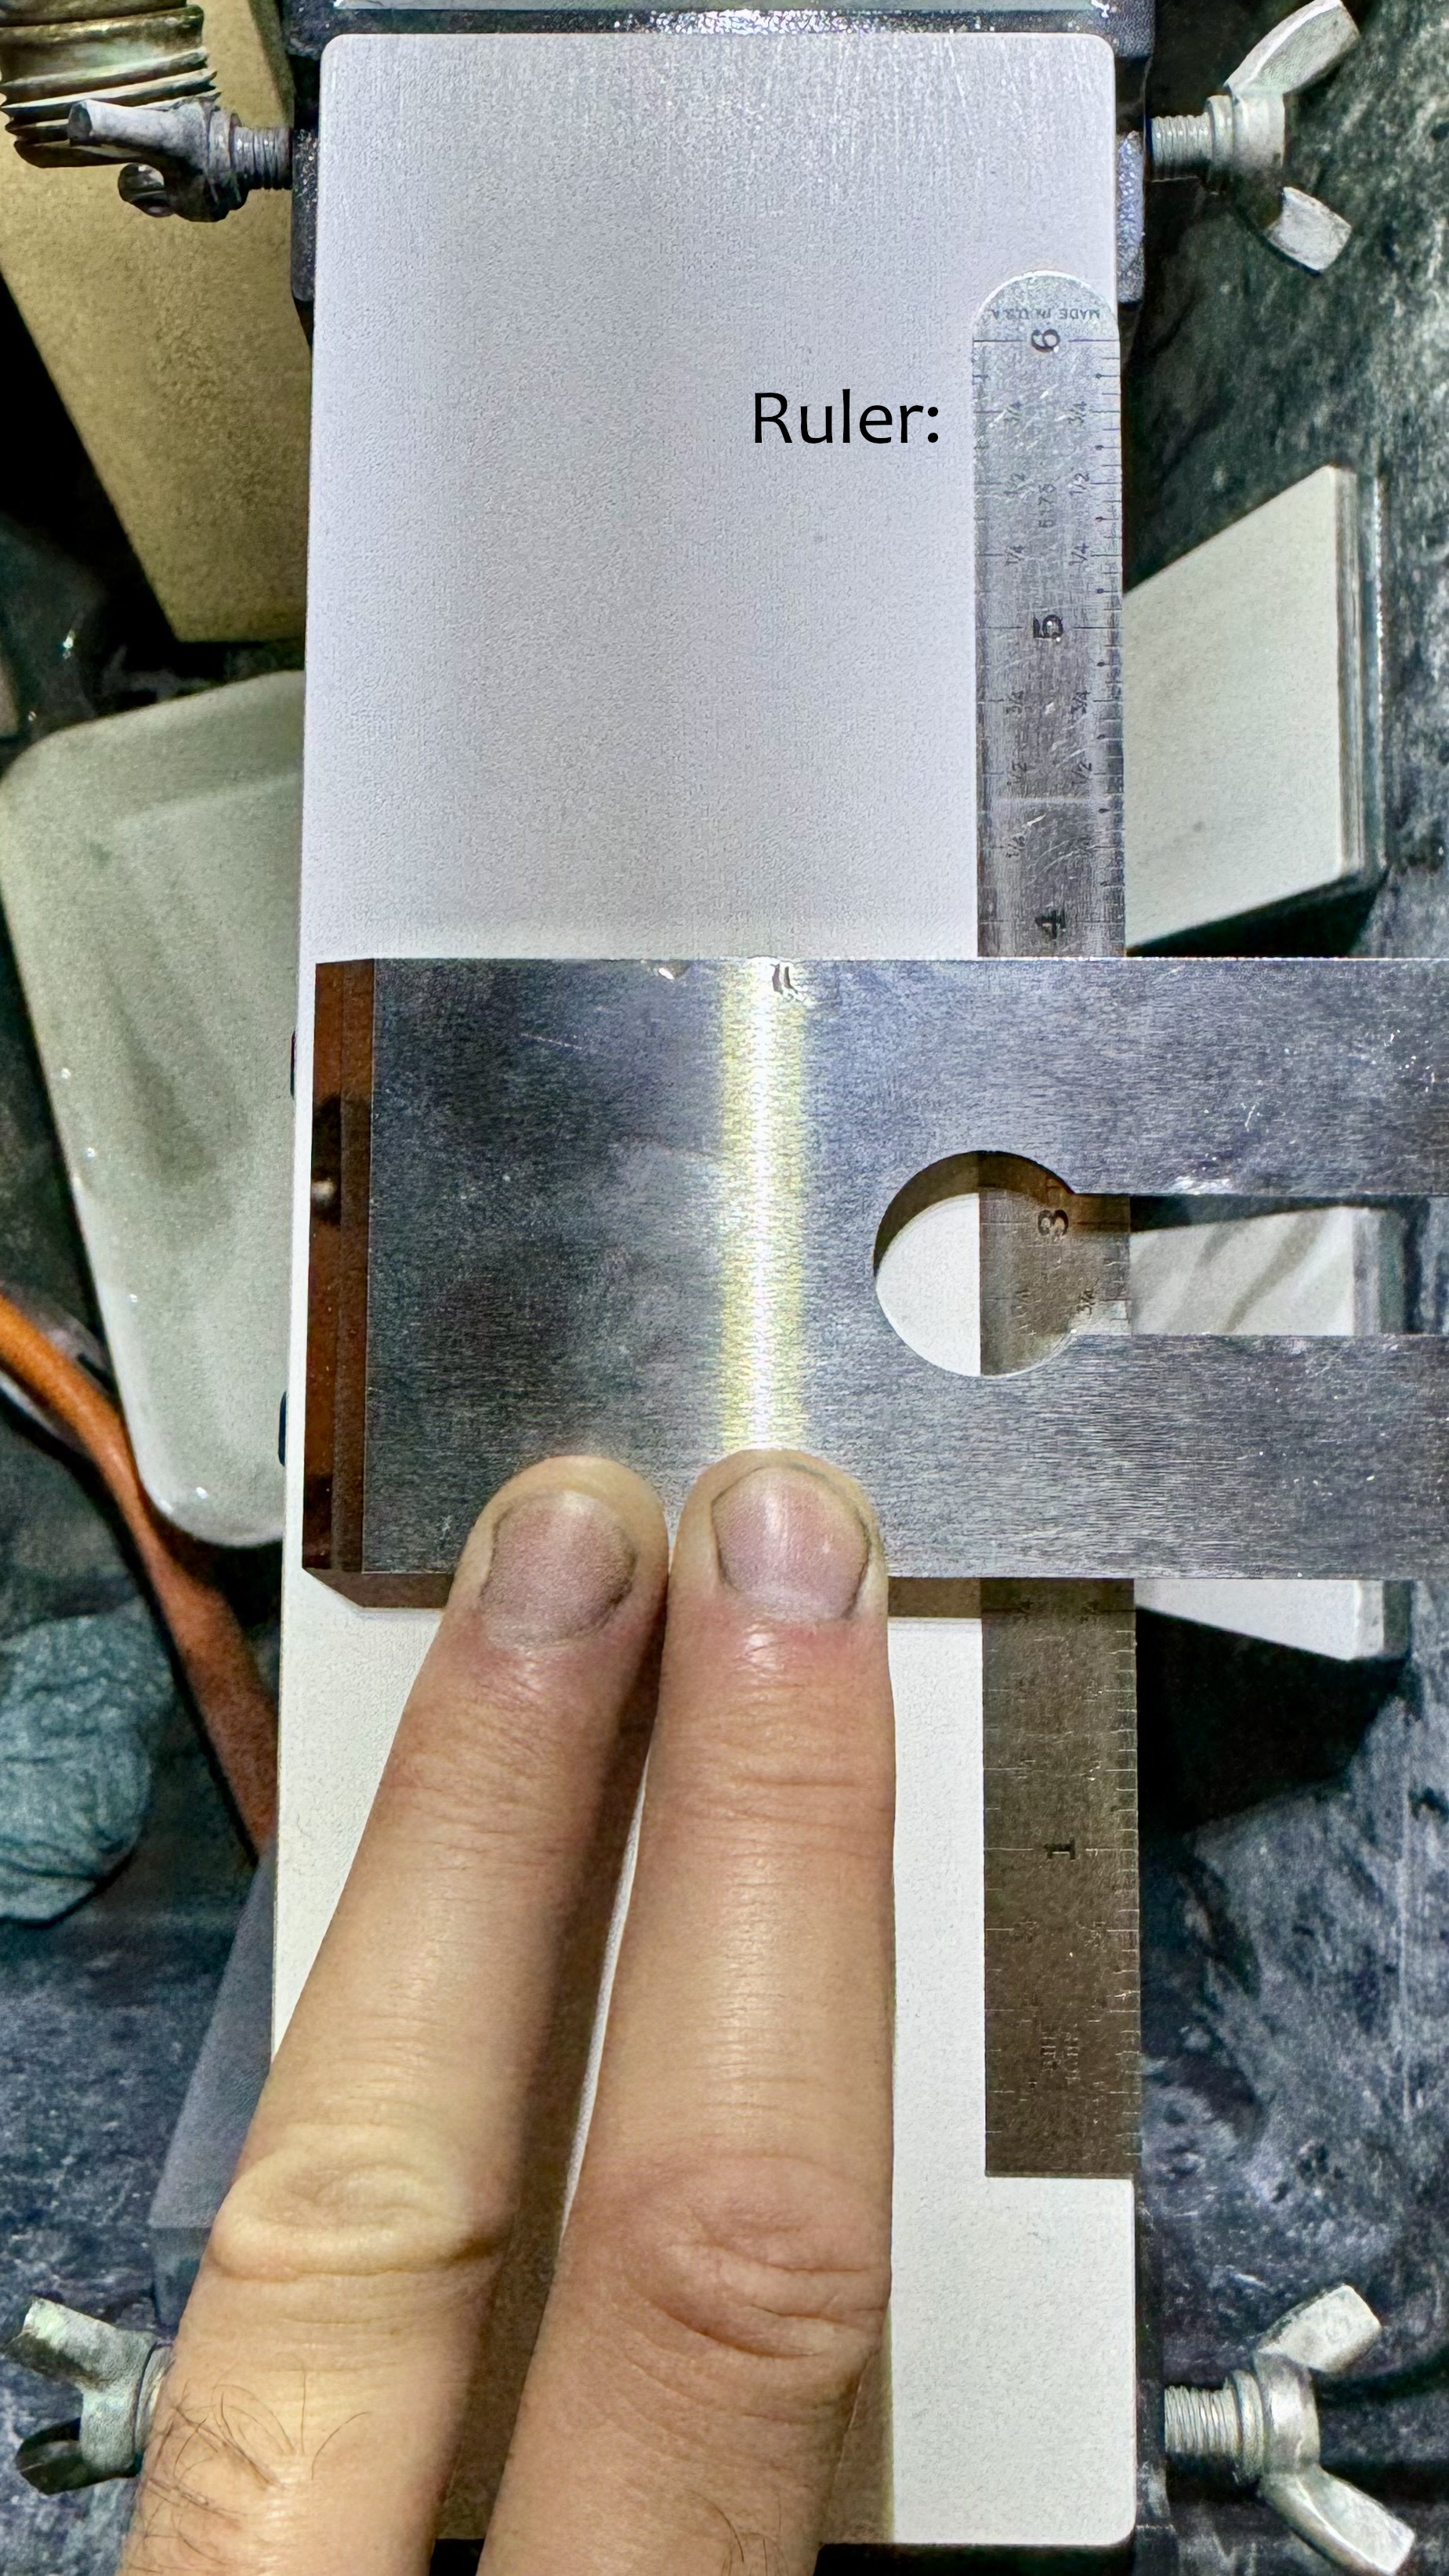
Ruler trick setup.
Ruler trick pitfall
Although the ruler trick avoids the need to lap the entire back, I believe it has one important drawback: the more you use it to remove the burr when sharpening the bevel, the more the back bevel “grows”, making the lapping process longer every time your sharpen:
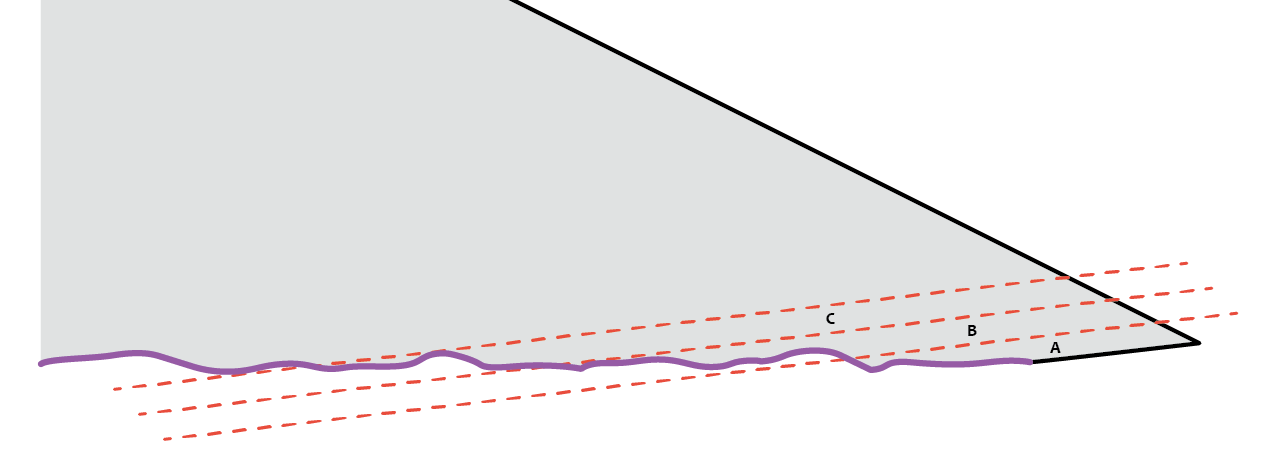
Growing back bevel with ruler trick.
In the diagram above, section A has less steel to remove than section B, and section B has less than section C.
When you can't take it anymore, your best option is to grind the bevel with some machine (bench grinder or belt sander) to remove the back bevel:

Removing the back bevel.
Lapping with the ruler closer to the cutting edge to increase the angle is a bad idea because then you're increasing the cutting angle:
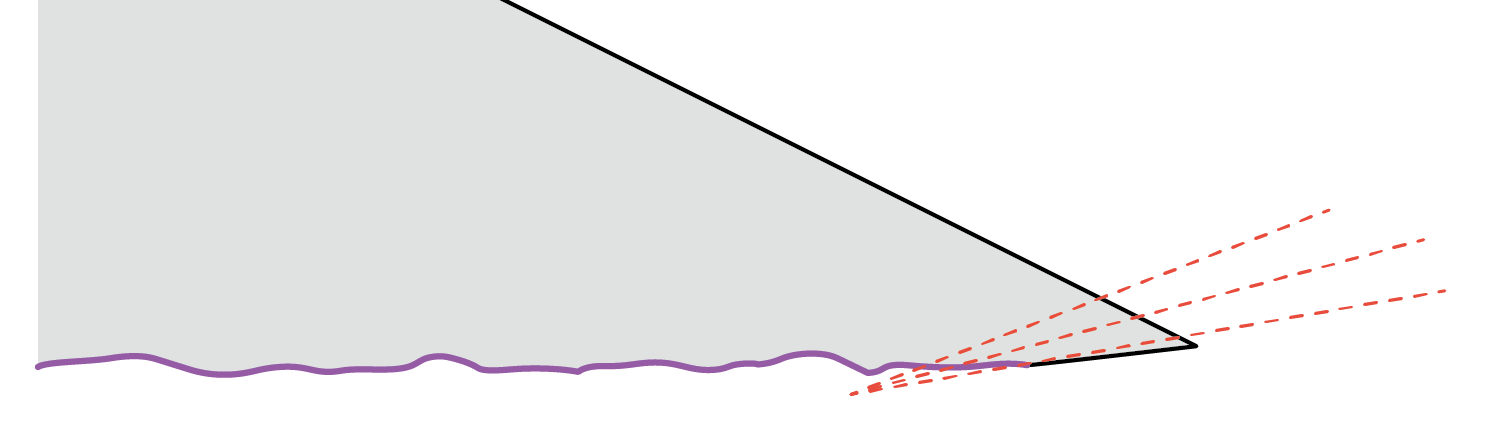
A bad idea.
Hollow grind
In the world of chisels, where you typically want a perfectly lapped face because this face is often a reference when making joints, it's acceptable and even advisable to have only the front (cutting edge side), back, and sides of the face touching the whetstone when lapping.
Paul Sellers explains this in his “How to Sharpen a Chisel” video. After all, the center section of the face is useless because it doesn't serve any referencing purpose.
The hand plane blade case is even better: we don't care about the sides of the face because the only thing making contact with the face is the chip breaker and it does so at 1/16" from the cutting edge.
This means we can reuse the concave chisel face concept for a hand plane blade to save time when lapping.
To do this, I grind the face on 1¾" with a die grinder or narrow belt sander, leaving only 1/8" untouched near the cutting edge. Lapping then only makes that 1/8" and whatever I want on the other side of the hollow contact the whetstone (hollow is exaggerated below):

A concave hand plane blade face accelerates the lapping process.
With this strategy:
-
Every time I sharpen the bevel, lapping the face to remove the burr is fast because there's little steel to remove.
-
The lapped part near the cutting edge doesn't “grow” like it would with the ruler trick.
After some tests, I don't think creating the hollow affects the performance of the blade in any way. Also, I only lap with my 16,000 grit whetstone when maintaining the edge, therefore I don't think the lapped surface will ever reach the hollow depth.
Here's a real life example:
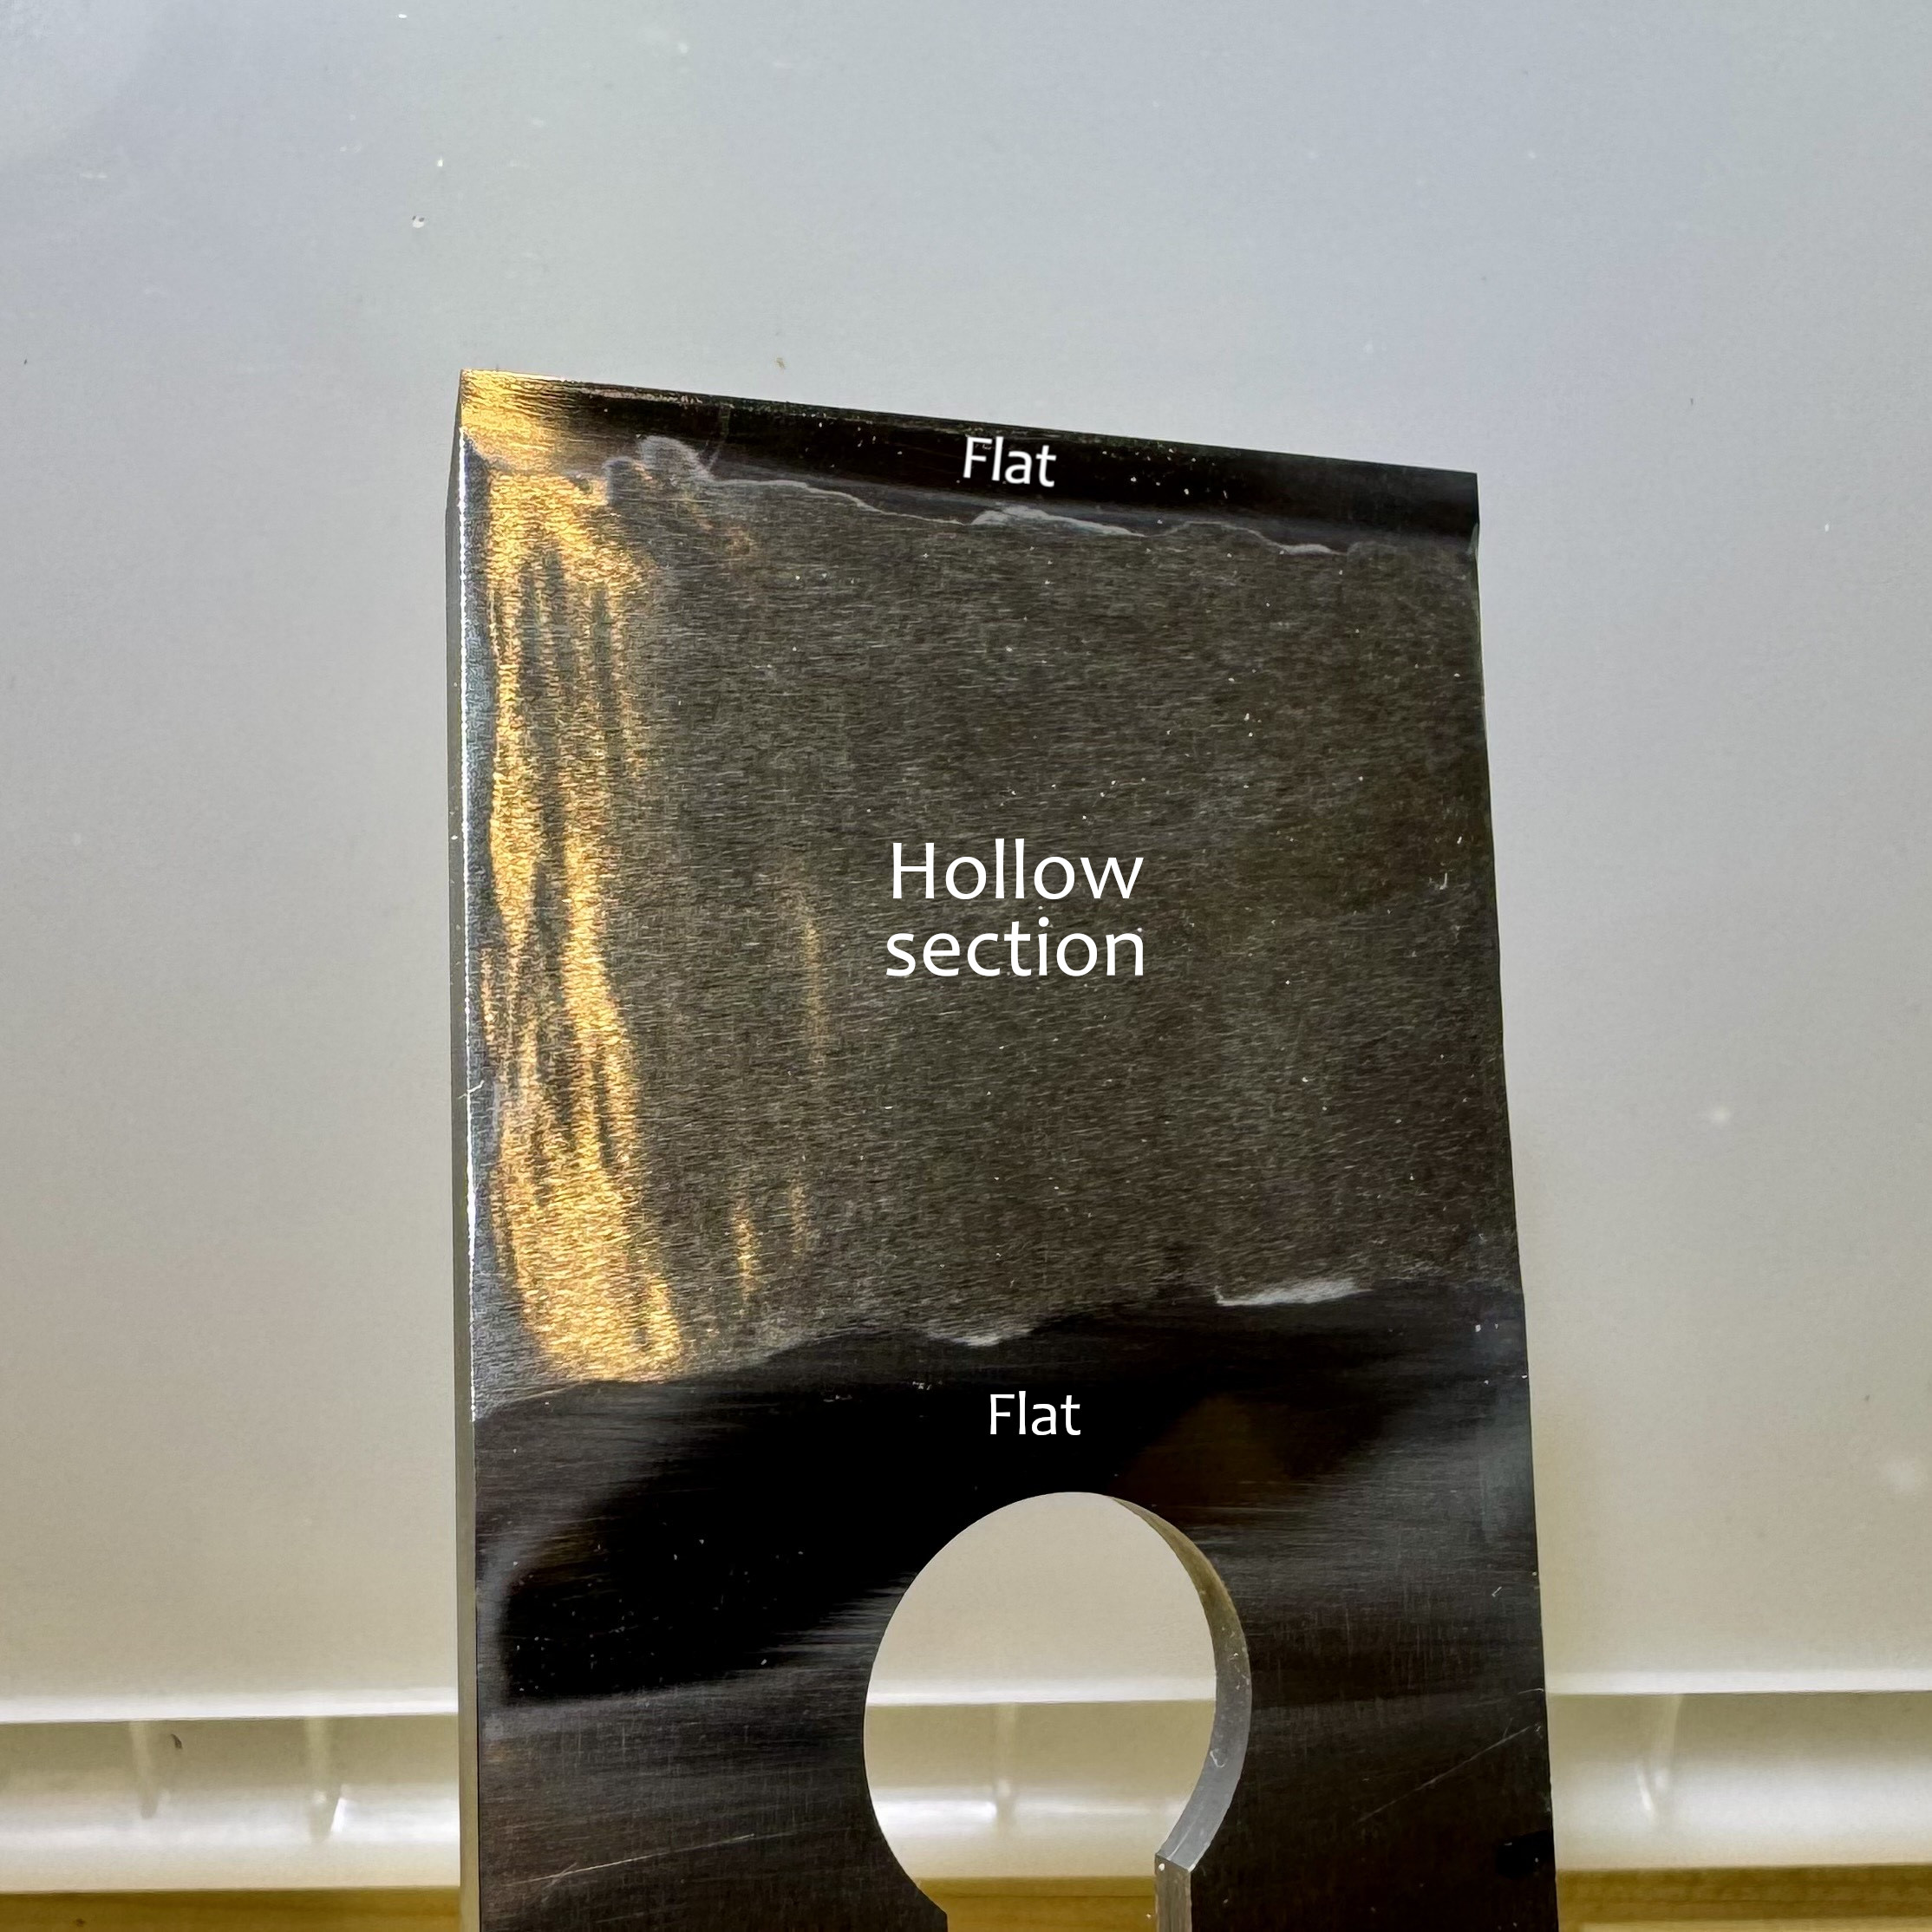
Concave hand plane blade face.
Here's a profile view of the hollow. Note that it's very deep in this specific case because I actually removed a back bevel this way instead of grinding the main bevel:
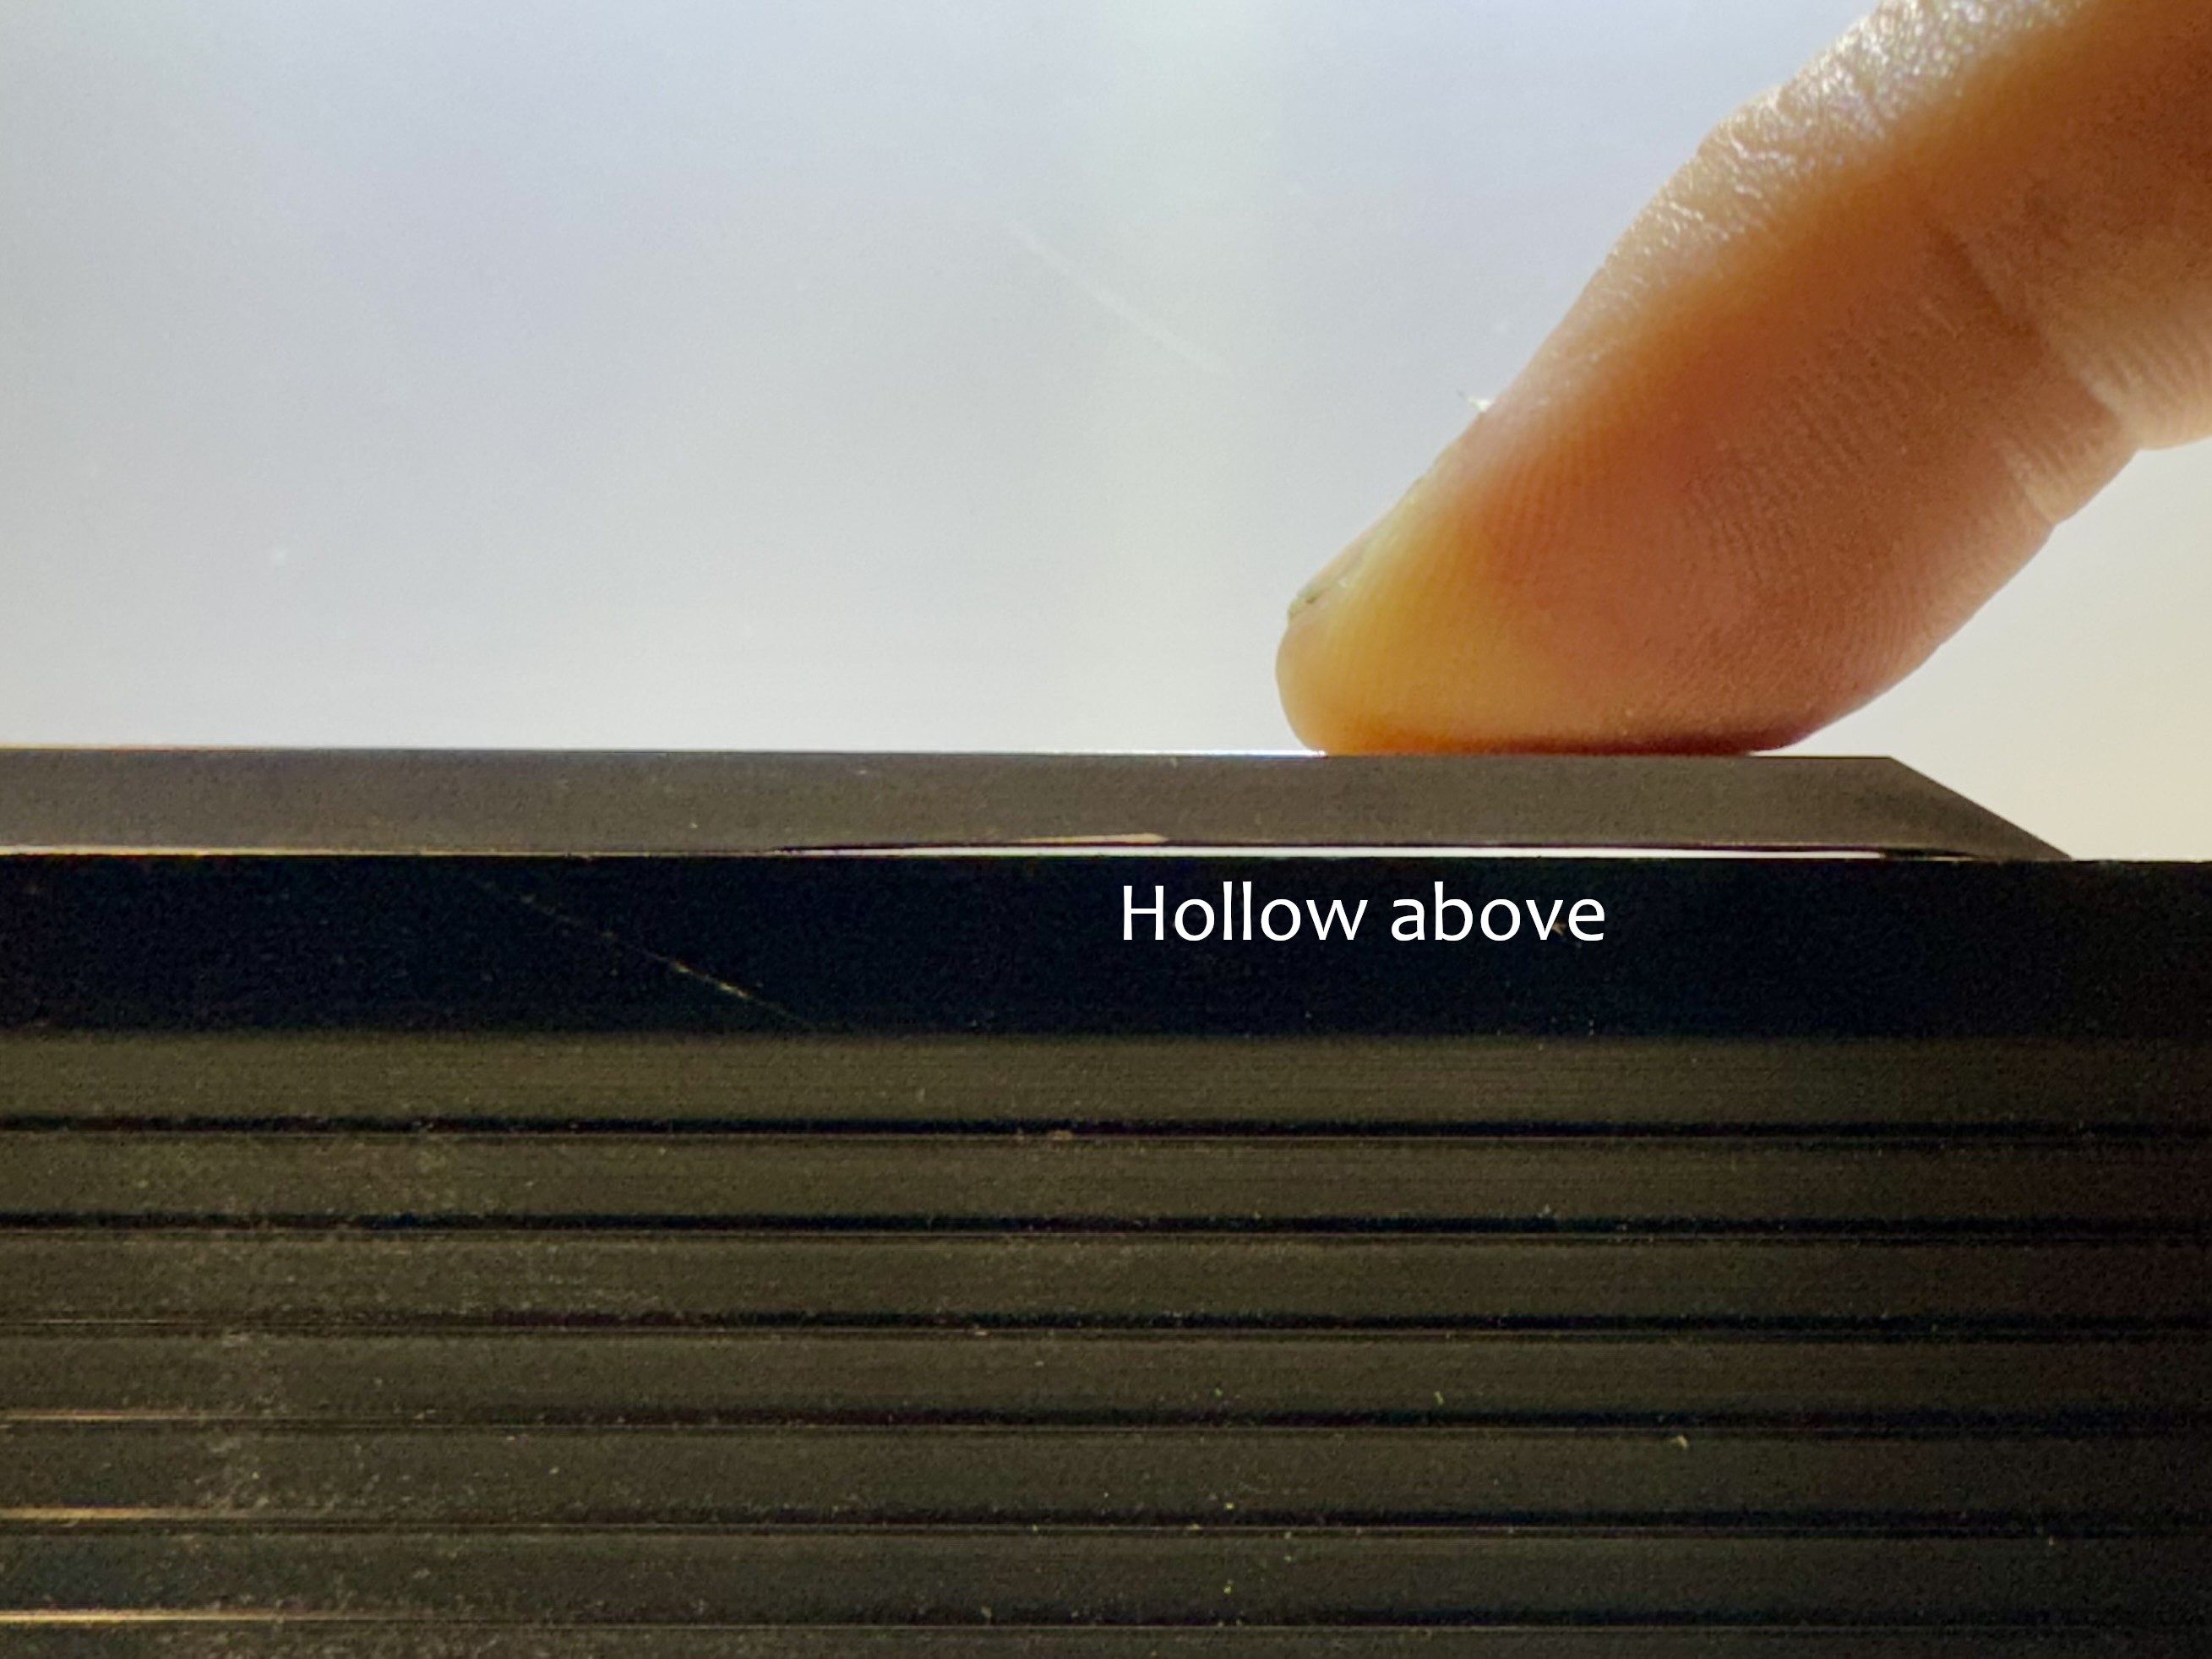
Profile of a real hand plane blade with a concave face.
There's probably a reason why I haven't come across this solution online. But as far as I'm concerned, I have shavings:
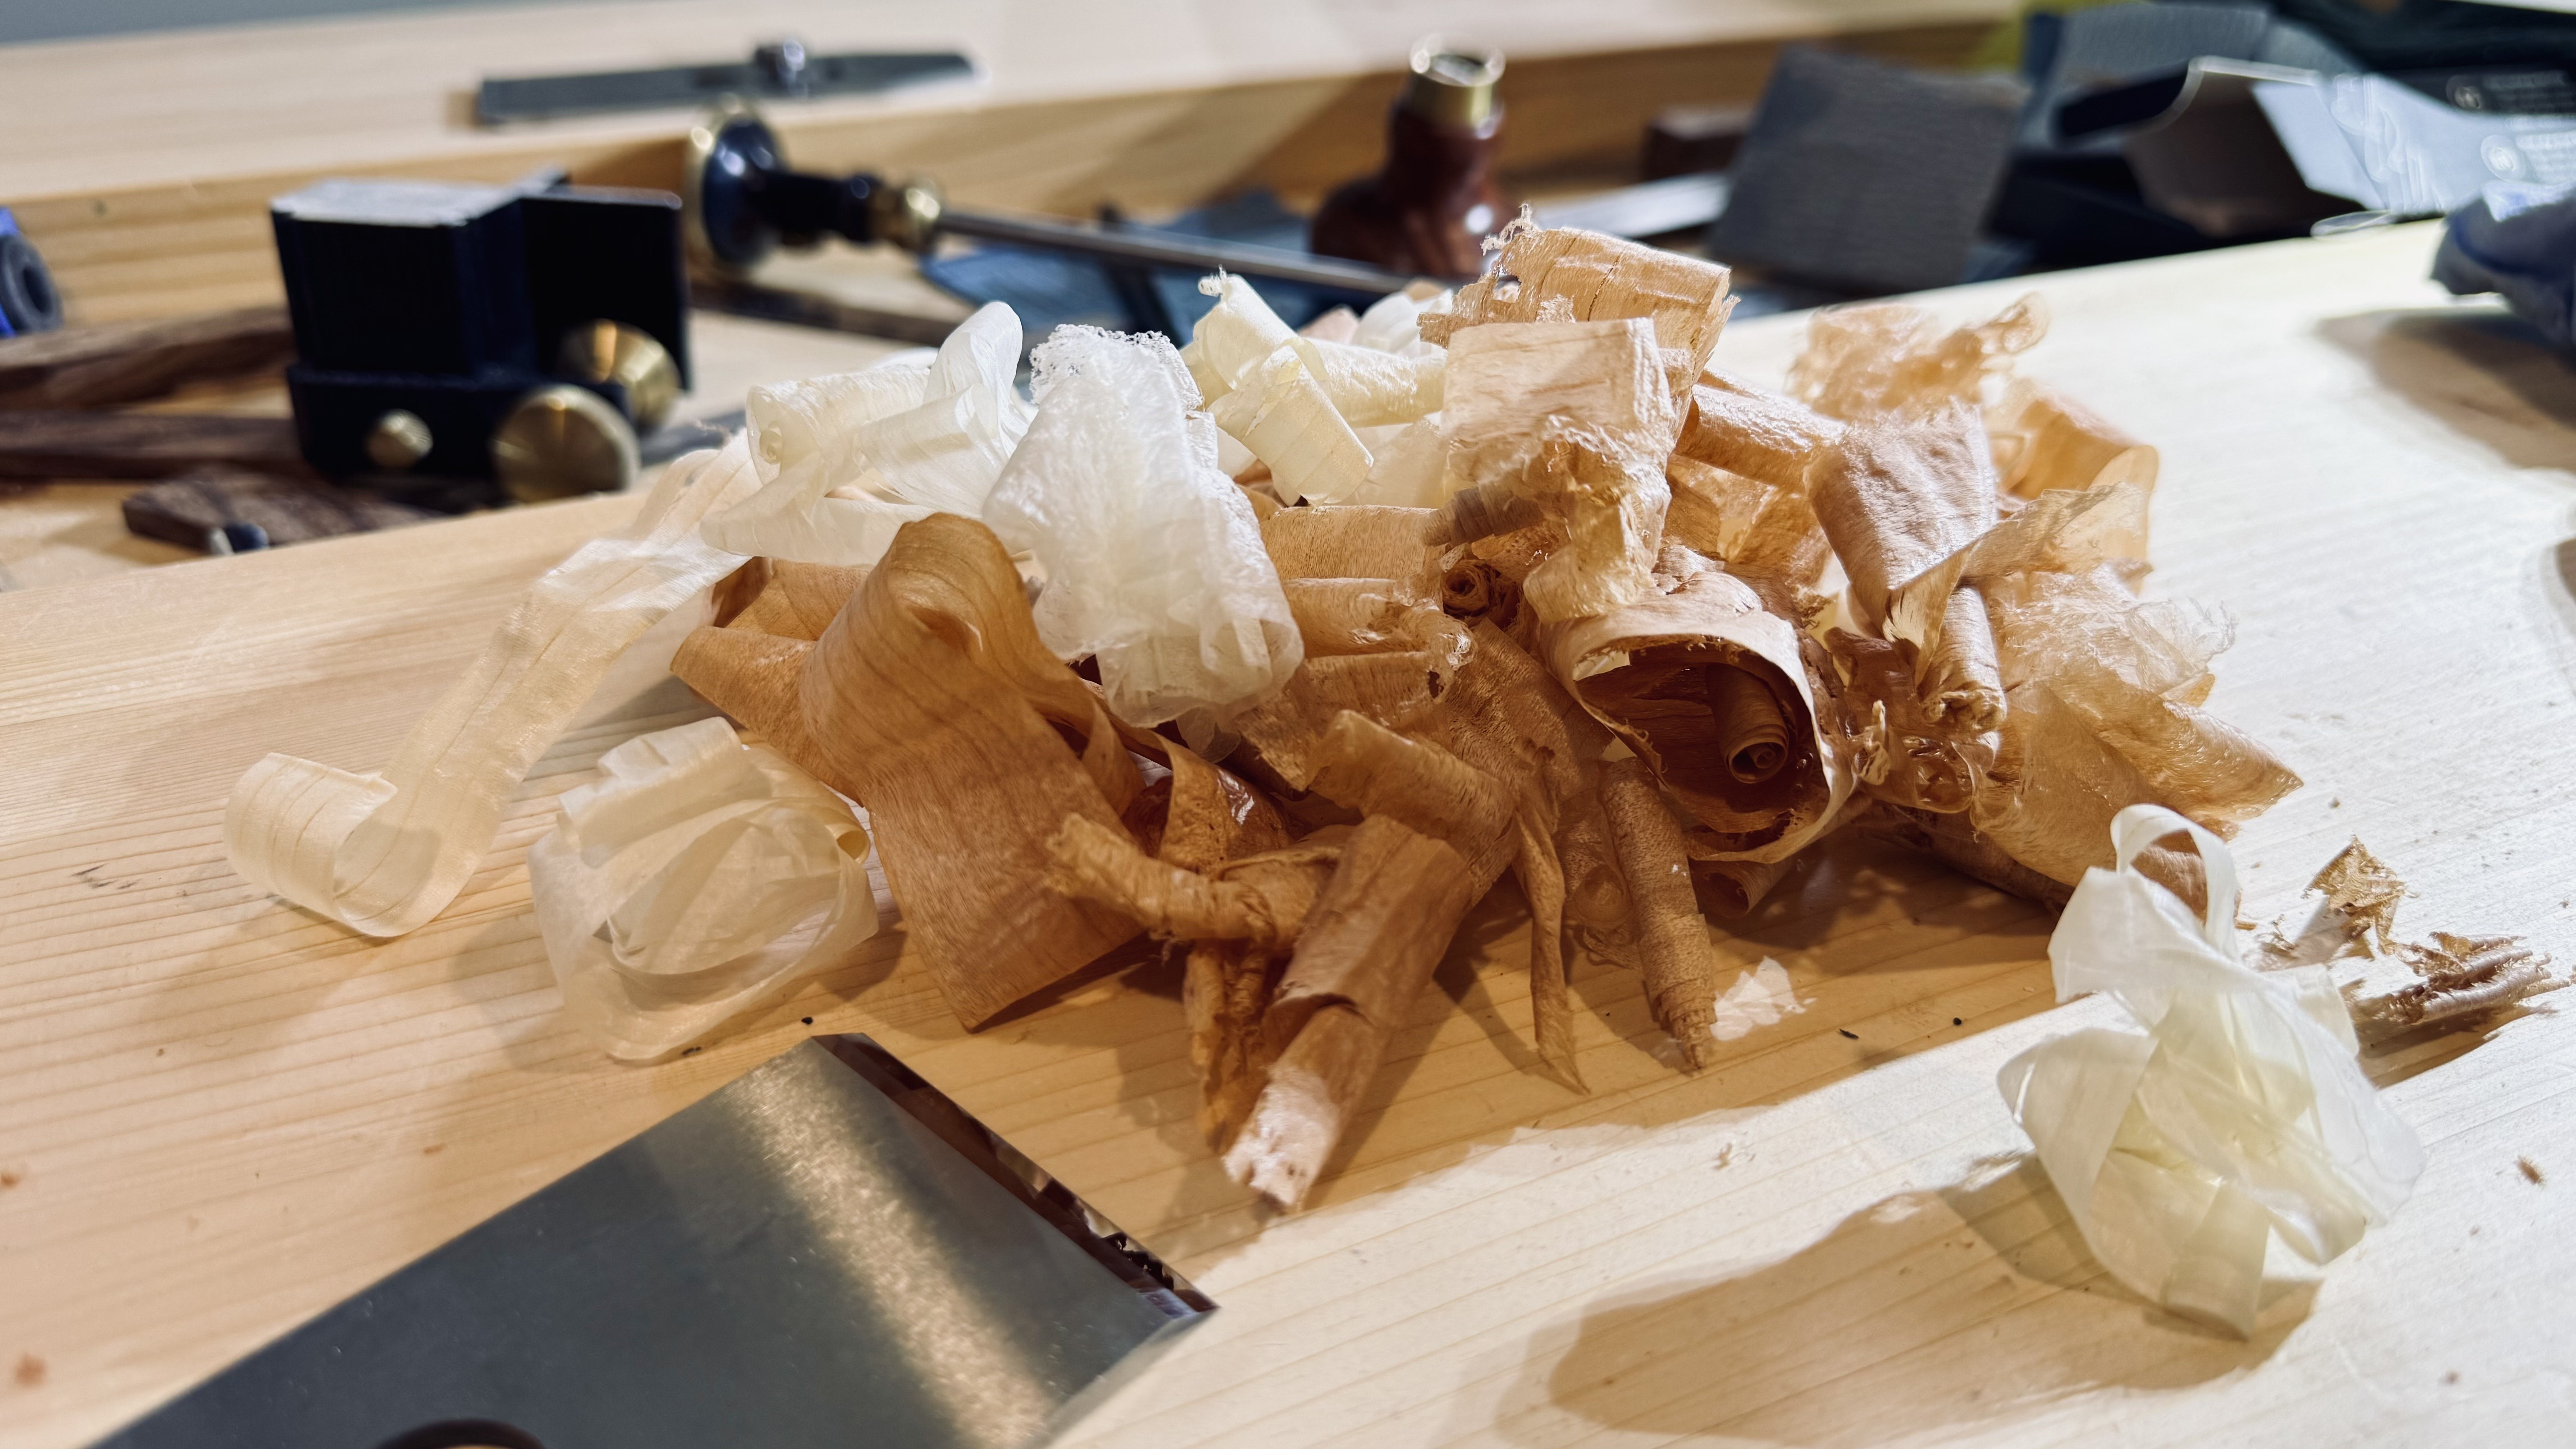
Happy lapping!